Sunday, January 17, 2010

How To Add Recent Posts Widget And Recent Comments Widget For Blogger.

I always mention that very large number of our readers leave their comments under some blogger templates asking about How To Add Recent Posts Widget And Recent Comments Widget For Blogger. And some of them wondering about how to add this widget that they see in the demo blog.
The good news is that it’s too easy to add it and it takes less than 1 minute, so lets do it.


Add Recent Posts Widget For Blogger.
Go to your dashboard >> layout, On your page elements page where ever you want to add the widget click add gadget and choose Feed. then enter : http://YOURBLOGNAME.blogspot.com/feeds/posts/default
and click Continue then save.

 
Add Recent Comments Widget For Blogger.
Go to your dashboard >> layout, On your page elements page where ever you want to add the widget click add gadget and choose Feed. then enter : http://YOURBLOGNAME.blogspot.com/feeds/comments/default
and click Continue then save.

Saturday, January 16, 2010

customize

Add a Guestbook to your Blog
If you have a Blog, personal or non-personal, you know how important (and encouraging) is to see some feedback from your readers. In Blogger, your readers can do this through comments, or a shoutbox (if you have one). But, Guestbook has more advantages..
Read the full article...


Customizing "Newer + Older Posts" Link
We're going to customize our Blogger footer a bit. To be more precise, the links Newer Post, Home and Older Post that we can find on the very bottom of the post. They are great navigation tools, but kind of invisible. So, let's make them little more attractive ans inviting..
Read the full article...


Change the width of your Blog - make it wider
This can be quite important feature, if you care about it....Changing the width of your Blogger Blog will gain you some extra space (to place more gadgets, pics, ads...), or it will make your Post section wider (meaning: larger pictures, wider paragraphs), you can also add a third column, if you want.....
Read the full article...


Change the order of posts in Blogger
In New Blogger, we can easily (but not so practically), change the order of our posts. The only way to do it is by changing dates of our posts. At least for now...
Read the full article...


Customize the Block Quotes in your Blog
We're going to learn how to customize the quotes in Blogger. By customize, I mean changing the looks of it, giving it some color, borders, background.....changing size of it, font, style...
Read the full article...


Each Post in different color or with different background
How to place different background picture for each post? Or how to make each post appear in different color? You can also use this style for a part of your post...
Read the full article...


Add a background to your Blogger Blog
Adding background picture (image) in Blogger is a great way to stylize your personal Blog, and make it stand out among the others. This way, you can personalized it, and make it recognizable and unique.
And it's quite easy, really....
Read the full article...


Tracking Your Visitors - Who's visiting my Blog?
It's always interesting to know who's visiting (reading) our Blog...Sometimes, it's just curiosity, but tracking your visitors can also give you important insight regarding...
Read the full article...


Email Subscription in Blogger - New Post Directly Into Mailbox
In this post, we're going to talk about Email Subscription for your Blog visitors. Your can offer two subscription options to your visitors...
Read the full article...


Contact form in Blogger - Add one to your Blog
Contact forms are a great way of communication with your readers. They are simple to integrate, simple to use, and quite reliable, too...
Read the full article...


Customize your Sidebar titles (headings)
In this tutorial, I'll explain how to customize Sidebar Titles in Blogger. How to change their clothes. By default, they are kind of "naked" and empty. But there's a lot that can be done. We can give them some background color, even a picture, an icon beside them, borders, lines......
Read the full article...


Move the date under the Post title in Blogger
In this tutorial we'll learn how to move (change the position) of the Date in Blogger. We will move it UNDER (below) the Post Title (by default, it's ABOVE it).
Read the full article...


Add a signature under your posts
Learn how to place a customized signature that will appear under your posts...
Read the full article...


Add a divider between Posts in Blogger
If you would like to place a customized divider between posts, something nice that will separate them, and you don't want a regular line, follow this easy instructions...
Read the full article...


Add a divider between Sidebar widgets in Blogger
We're gonna make a divider in our Sidebar, which will separate the widgets, and distinguish one from another..
Read the full article...


Add an icon to Labels and Links in Blogger Sidebar
Make the Link list, labels, or other sidebar lists more visible...Add an icon to each.
Read the full article...


Customize your Post Titles
How to customize your blogger Post Title...we can add some background picture behind the post title, or borders, change font...well, a lot.
Read the full article...


Add an icon beside your Post Title
If you would like to have a custom picture (image or icon) beside your Post Title, follow these instructions...
Read the full article...


Place a custom header image (banner) in Blogger
If you want to make your Blog unique, you should make your own header image. For a start. It can be anything....a photo, graphic design, drawing, picture you like...
Read the full article...


Navbar in Blogger - remove it, or customize it
Blogger Navbar appears by default at the top of every Blogger-powered blog.When you are blogging, Navbar can be very useful thing, but sometimes, it can get in way...
Read the full article...


Customize the Quickedit icons
How to change the looks of quickedit icons...
Read the full article...


Remove the Quickedit icons in Blogger
These quick edit icons are very useful in fact. You can edit your Posts and all the Widgets (Gadgets) in one click...They do mess up the looks a little bit, but only for your eyes. Nobody else can see those icons...
Read the full article...


Embedded Comment Form-All comments below Post
Well, you all know the default Blogger Comments appearance...not so nice, right? They open in a new window (or pop-up), and the default design of that page has nothing to do with your template. They are a mess...
Read the full article...


Remove the Label number (counter)
In default Blogger templates, in your Label list, you can see the counter (number) beside each label. If you would like to get rid of this, read on. It takes a minute....
Read the full article...


Remove "Subscribe to: Posts (Atom)"
If you want to completely remove (or temporarily hide) "Subscribe to: Posts (Atom)", read on...
Read the full article...


Add a customized RSS icon in Blogger
Here 's the cool way you can insert your customized RSS icon. No sweat, no tears. First you'll need to have the picture (icon or whatever), you want to to place as your RSS...
Read the full article...


Borders in Blogger Template
In Blogger default templates (like Minima), you can see that all kinds of borders are present. Borders around header, borders between posts and sidebar gadgets....
Read the full article...

BLOGGER HELP

Blue Links problem in Blogger
One of the frequent problems in Blogger is that sometimes, a single post or a mistake in your HTML code, can turn the default link color of your Blog, into blue....
Read the full article...


Clear your Cache - why and how?
Clearing your web browser's Cache can solve numerous problems (errors) in Blogger. The most usual ones are...
Read the full article...

PICTURES & VIDEOS

Uploading pictures in Blogger - advices
In this article we will talk about upload of pictures (images) in your Blogger Blog. I'll try to point out some advantages and disadvantages, and share some general advices about using a free picture hosting services (Photobucket, Imageshack...) instead of using only the default Blogger image upload...
Read the full article...


Add a video to your Blogger Blog
How to upload video files in Blogger? It's quite simple really. You can upload (embed is better word) videos from services like Youtube.com, or you may want to upload your personal videos from your camera or computer...
Read the full article...


Customizing videos in Blogger 3
In part 2 we'll learn to make a Video Gallery and set the video to Autoplay...
Read the full article...


More pictures in one row - side by side pics
By default, when you upload pictures (images, or videos)) into your Blogger Posts, they are placed one after another. In one column. We'll learn to place more pics in a row, side-by-side...
Read the full article...

blogger safety

Back up your Blog completely: Posts + Comments
How to back up your Blog content, for safety (in case you delete your blog, or lose it somehow), or if you deside to import your Blog content to another Blog...
Read the full article...


Back up your Blogger template (layout) design
It's very important to save a copy of your template (back it up) before you make any customization (especially when you plan to tweak the HTML code). If something goes wrong, you can always go back in your old shoes....
Read the full article...


Back up your Blogger widgets (gadgets)
If we want to switch to a new Template (change a design), or to switch to another Blog platform, we have to make sure that we don't lose our gadgets (widgets)...Like links, pics, text..Some widgets can't be lost, but some can.
Read the full article...


Print your Blog as a hard copy
Printing you Blog as a hard copy is another option of backing up your Blog. And can be a fun too...
Read the full article...
how to


BLOGGER CUSTOMIZATION
Customize your Blog, add things, remove things, change, paint, cut, add a background, change headings...well, anything you'd like, really...


BLOGGER HELP
Here, we'll discuss about some Blogger errors and try to fix them. Also, you'll learn how to fix common errors made by authors (our mistakes)... 


PICTURES & VIDEOS
Everything about pictures (photos) and video files in your Blogger Blog. Advices, customization, effects, slideshows, galleries...


BLOGGER SAFETY
How to back up (save) your Blog content, also your widgets and template (layout) design. Avoid the worst, put safety first...


Guestbook in Your Blogger Blog

This summary is not available. Please click here to view the post.

Customizing "Newer + Older Posts" Link in Footer

We're going to customize our Blogger footer a bit. To be more precise, the links Newer Post, Home and Older Post that we can find on the very bottom of the post.

WHAT ARE THOSE?
For those who do not know, Newer Post, Home and Older Post are links that appear on the bottom of the posts. When visitors click on, lets say, Older Posts, it will take them to the Page with the set of your previous posts.
The number (set) of the posts on this page will be the same as the number of the Posts on your main page (don't think that a click on the Older Posts will open ALL of your Posts!)
You can adjust the number of the posts on the main page going to LAYOUT ► PAGE ELEMENTS ► and clicking on Edit in the BLOG POSTS box.....

WHY IS THIS SO IMPORTANT? IS IT AT ALL?
It is. This is a great navigation tool for your visitors. If you make these links more visible and eye catching, people will click on them, and will be dragged into the maze of your Blog posts...and stay there forever and ever...
Ok, seriously, I suggest doing this.

SO, WHAT CAN I DO?
This is a fun part. You can customize these links in Blogger in a few ways:

► changing the text of Newer, Older, Home links
► placing a picture beside them (a small icon, arrow, or whatever...)
► placing a picture (image) instead of these links

First, back up your Blogger template. Avoid the worst. Put safety first.
When you've done this, let's identify the code we're going to mess around with....Go to:
LAYOUT ► EDIT HTML ► click on Expand widget templates in the upper right corner....Locate this part of the code:

<b:includable id='nextprev'>
<div class='blog-pager' id='blog-pager'>
<b:if cond='data:newerPageUrl'>
<span id='blog-pager-newer-link'>
<a class='blog-pager-newer-link' expr:href='data:newerPageUrl' expr:id='data:widget.instanceId + &quot;_blog-pager-newer-link&quot;' expr:title='data:newerPageTitle'><data:newerPageTitle/></a>
</span>
</b:if>

<b:if cond='data:olderPageUrl'>
<span id='blog-pager-older-link'>
<a class='blog-pager-older-link' expr:href='data:olderPageUrl' expr:id='data:widget.instanceId + &quot;_blog-pager-older-link&quot;' expr:title='data:olderPageTitle'><data:olderPageTitle/></a>
</span>
</b:if>

<b:if cond='data:blog.homepageUrl != data:blog.url'>
<a class='home-link' expr:href='data:blog.homepageUrl'><data:homeMsg/></a>
<b:else/>
<b:if cond='data:newerPageUrl'>
<a class='home-link' expr:href='data:blog.homepageUrl'><data:homeMsg/></a>
</b:if>
</b:if>

</div>
<div class='clear'/>
</b:includable>

...now, as you can see, there are three groups, one for each link:
► pink represent the code for Newer Post link
► orange for the Older Post
► green for Home
► white wraps all of these up...

Changing the text of the links
You need to REPLACE following parts in original code with ANY TEXT you like:
► replace with, for example NEXT POST
► replace with, for example PREVIOUS POST
► replace (only the first one) with, for example HOMEPAGE
Click here to see the complete code


Placing icon/picture beside links
You will have to INSERT the code for picture:

<img src='http://i42.tinypic.com/zn4qic.jpg'/>

...replace the part in orange with URL of your hosted picture...
...use small icons...
Click here to see the complete code


Picture/image INSTEAD of links
This one is my favorite! You can place any kind of picture you want! All you have to do is use this code for the pic:

<img src='URL ADDRESS'/>

...just replace the part in pink, with the URL of your hosted picture...
...and in code, REPLACE the original link code for text with picture code:
► replace with the pic for newer (next) posts
► replace with the pic for older (previous) posts
► replace (only the first one) with the pic for homepage...
Click here to see the complete code


That's about it....Oh yes, one more thing:

Switch places of the links

If you find the position of Newer/Older post awkward (I do), you can switch their places easily. Making Newer posts appear on the RIGHT side, and Older posts on the LEFT side (like a book). To do this, go to LAYOUT ► EDIT HTML, and find the following part in code (CSS style):

#blog-pager-newer-link {
float: $startSide;
}

#blog-pager-older-link {
float: $endSide;
}

...just switch the float style, so it will look like this:

#blog-pager-newer-link {
float: $endSide;
}

#blog-pager-older-link {
float: $startSide;
}

...Ok, this is really it now....be creative, you can do whatever you imagine...

If you need help, or have some ideas, ask, share...

Smile!

Change the Width of Your Blog - Make the Blog Wider


This can be quite important feature, if you care about it....Changing the width of your Blogger Blog will gain you some extra space (to place more gadgets, pics, ads...), or it will make your Post section wider (meaning: larger pictures, wider paragraphs), you can also add a third column, if you want.....


CURRENT SITUATION (What's out there?)

There's a thousands of templates out there...you have Blogger default templates + Dozens of other sites that provide a free Blogger Templates...
All right, you knew that....but here's another thing you should consider:
There are 2 kinds of templates (layouts) you can use:

FLUID width or STRETCH templates - template that resizes to fit any computer monitor. It stretches corresponding to the monitor resolution.
Advantage is obvious, and a big disadvantage is DESIGN. It's quite restraining when it comes to this. Of course, it depends what you like. For a professional looking template, it's great....But for a personal one, it can be a bit dull.....

FIXED WIDTH templates - they have a fixed width, regardless of monitor resolution....They are ideal for designing and customizing, but, the width part can sometimes be a real pain in the....:]
...Why? Because:
- people have different Monitor (screen) sizes,
- and they use different resolutions on them...
...the final result is: Blog appears different in each combination!

Read more about Monitor sizes and resolution, and how to change the resolution...

Imagine lying down in the grass with your nose pressed deep into the thatch. Your field of vision would not be very large, and all you would see are a few big blades of grass, some grains of dirt, and maybe an ant or two. This is a 14-inch 640 x 480 monitor. Now, get up on your hands and knees, and your field of vision will improve considerably: you'll see a lot more grass. This is a 15-inch 800 x 640 monitor. For a 1280 x 1024 perspective (on a 19-inch monitor), stand up and look at the ground. Some monitors can handle higher resolutions such as 1600 x 1200 or even 1920 x 1440—somewhat akin to a view from up in a tree...►

SHOULD I CHANGE THE WIDTH OF MY BLOG?
Well, it depends. If you already have a wide template, or you're using Stretch (fluid) layout, there's no need of doing this...

Resolution friendly
means that your Blog doesn't exceed the width of 750px. Why 750? Because statistics tells us that lots of people are still using a 800x600 px resolution. And if you make your Blog wider than 750, these group of people will have to scroll left-right on your page....which is quite irritating. And you can lose those visitors....

But, there's also a saying, and it goes like this:
Lie ► A Bigger Lie ► Statistics.

If you surf a bit, and pay attention to web pages width, you'll notice that lots of web sites (even popular ones), are way over the 750 px!
So, it's really up to you....

LET'S CHANGE THAT WIDTH ALREADY.....
The only problem here will be the identification of the CSS style in your template (Layout). This is the part in the code section that defines styling, including width of elements.
There's so many different templates around, and it's a different story for each one...

But don't worry....there's a pattern. A backbone. A Layout constitution. A certain way of organizing (naming) elements. It's basically the same thing, under the different name.....
For this example, we'll take a default Blogger template ► Minima. Let's do it.
1. First thing is identification. Go to: LAYOUT ► EDIT HTML, and find the parts that defines the width of the Main section, Post sections, Sidebar, Header Section and Footer.
For Minima, we have this situation:

#header-wrapper {
width:660px;
margin:0 auto 10px;
border:1px solid $bordercolor;
}
..................................

#outer-wrapper {
width: 660px;
margin:0 auto;
padding:10px;
text-align:$startSide;
font: $bodyfont;
}
..................................

#main-wrapper {
width: 410px;
float: $startSide;
..................................

#sidebar-wrapper {
width: 220px; float: $endSide;
..................................

#footer {
width:660px;
clear:both;

...in Minima (and lots of other templates) elements are categorized by these names:
header-wrapper is Header
outer-wrapper is our Main section, other elements are wrapped inside of it..
main-wrapper represents Post Section
sidebar-wrapper stands for Sidebar
► footer is Footer :]

...this means that our header-wrapper is 660px wide, outer-wrapper width (Post section + Sidebar+ margins) is also 660px, and footer 660 px.

2. Let's change the width:

#header-wrapper {
width:750px;
margin:0 auto 10px;
border:1px solid $bordercolor;
}
......................................................................
#outer-wrapper {
width: 750px;
margin:0 auto;
padding:10px;
text-align:$startSide;
font: $bodyfont;
}
.......................................................................

#main-wrapper {
width: 500px;
float: $startSide;
........................................................................

#sidebar-wrapper {
width: 220px;
float: $endSide;
........................................................................

#footer {
width:750px;
clear:both;

..I've decided to make my Post section (main-wrapper) wider. In order to do this, I have to increase my outer-wrapper. Now, here's the RULE:
If you want to increase the width of your Posts section or Sidebar, you HAVE to increase your Main section width (outer-wrapper) for the same value!
500px + 220px + margins = 750px

In this example, I've increased my Post section (main-wrapper) for 90px, so I've changed 410px into 500px. I did the same for the Main section (outer-wrapper), changed 660px into 750px....I've left the Sidebar the same width, 220px.
I've also changed the width for my header-wrapper and footer....into 750px. Note that this is not necessary, but better do it...for the sake of symmetry in your Layout...

That's about it. Remember, when you're changing the width of your (custom) Blogger template, certain elements will be (can be) under different name....Do not let it confuse you! You know how the elements are organized inside of it....and in the end, its a 5 minutes job...some simple mathematics + patience.....

If you need any help, ask.....

Smile!

Change the order of posts in Blogger + Sticky post

CHANGING ORDER OF YOUR POSTS (BACK DATING)

In New Blogger, we can easily (but not so practically), change the order of our posts. The only way to do it is by changing dates of our posts. At least for now.

That means, if I don't want my NEW post to appear as a FIRST one on the page, when composing it, I'll change it's date to the past (back date it). Now, even if it's just published, it will go "down" as far as I've set the date...This is practical when:

  • you're designing your blog, and want to make, for example, categories, or lists, menus....and you don't want those to appear as a regular post
  • you just want to change the order of your posts
  • and you'll think of more.....
To do it, go to:
DASHBOARD --> POSTING --> EDIT POSTS, click on "Edit" of the post you want to play with, and on the bottom of the box, click on the "Post Options".
Change the date. Publish the Post.


STICKY POST

"Sticky" post is a post that will appear on your main page as a FIRST post. On the top of your Blog. Always (or as long as you want). This is convenient when:
  • you want a certain post to be the first thing your reader will see
  • you want to make some announcements, or navigation, categories, or anything else (giving your blog a website look)
  • it's practical, easy editable, and you can always remove it, of course...
I'll show you 2 methods of doing this:

1. Sticky Post by changing the date of a post
If you would like a certain post to appear (and stay) on the top, go to:

DASHBOARD --> POSTING --> EDIT POSTS, click on "Edit" of the post, and on the bottom of the box, click on the "Post Options". (look at the picture above).
  • change the date. Set it as far as you can in the future. Remember, when that date comes, your post will go down, so it's better to send it as far as you can.
  • publish the post
  • there's no limit on changing dates for posts. You can do it as many times as you want

IMPORTANT!
This will not work if the post wasn't previously published. That means: you can't create a NEW POST, and set it's date in the future. If you publish it like this, it will be SCHEDULED.

2.Sticky post in a Gadget
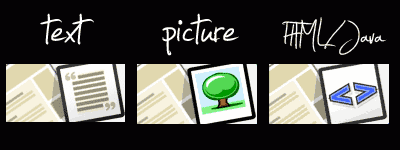
You can use "Text", "HTML/Java Script" or "Picture" Gadgets to make your "Sticky". Go to:

DASHBOARD --> LAYOUT --> PAGE ELEMENTS, "Add a Gadget", and choose one from the list ("Text", for example).
Edit it, and place some text in it, or pictures, or whatever...."drag" the box in PAGE ELEMENTS above you post section, to make it appear Above posts.


  • advantage of this method: no changing dates, it appears on the top until you remove it, it's easy to edit
  • disadvantage: it's not same as composing posts. There's no "link" buttons for uploading pictures automatically, and you'll have to use HTML code a bit (maybe not, depends what kind of content you'll have)
  • in overall, it's a good method
Smile!

Based on original Visionary template by Justin Tadlock
Visionary Reloaded theme by Blogger Templates
This template is brought to you by Blogger templates

Visionary WordPress Theme by Justin Tadlock Powered by Blogger, state-of-the-art semantic personal publishing platform